Wednesday, July 13, 2011

New Mickey Templates and another Stashbuilder: MickeyHeads for your Disney Digital Scrapbooking!

Hey all! It's my turn to host the weekly challenge. :)

I am often inspired by the designer Scrapping with Liz. She has so many creative templates to use in soooo many ways.
I saw this one and thought what an awesome idea to use a "cut up" of a shape by filling it with papers, photos, adding staples, stitches, etc.


(Please note that I'm not affiliated with Scrapping with Liz - I just find her inspiring!)

So I decided to adapt that idea for our challenge this week! I made 8 FULL SIZE Mickey Head page templates for you!!


I'm SO EXCITED to see all of the different ways people use them! I'm still working on my own page :)

You can download them here.

Also, my friend Charlene, made them in page files for StoryBookCreator users.  You can download those files here.

And I've got another one of my Stashbuilder:Mickey Heads for your Prize Package. This is volume #3 - monochromatic Mickey Heads.


To get the PP, find the rules and challenge here at MouseScrappers.

Hugs,
Denise aka A Grieving Mommy

New Mickey Scatters in Gold and Silver Colors

Get these new Mickey Scatters by joining me in a few challenges this week!


You can find out about the challenges here and here!

Sunday, July 3, 2011

New Freebie Template for Disney Digital Scrapbooking - Mickey Wheel Template

I'm hosting another template challenge over at MouseScrappers!  So I have a new freebie Disney digital scrapbooking template for you :)
It was inspired by our love/hate relationship with the Mickey Wheel at Disneyland's California Adventure!  (Formerly the SunWheel.)  That ride is freakin' scary!  Who knew???!  WE certainly didn't the first time we went on it!  I'm talking about the swinging gondolas not the stationary ones.  It was back in 2006 the first time, my husband and I went on it and we were blown away by how scary it was.  So we went back on it and took my little brother and sister with us (for their first time) and to record their reaction on video.  You can't see anything, because it was at night which made it even scarier!
The MickeyWheel is for sure the most unexpectedly scary ride at Disneyland.
Here us scream on it:

So I was inspired by some past starburst pages I've done and by the Mickey Wheel itself:

Here is the template I made.  I'm excited to see what you do with it.
I'll be whipping up a prize package for ya in the next few days!

In psd for photoshop users and png files for other programs.
Download it here
Or here


Enjoy!
Hugs,
Denise aka A Grieving Mommy

Saturday, June 4, 2011

Have you ever been an Honorary Citizen at Disneyland or Disneyworld? Do you have the button to prove it?! Introducing my latest Disney Digital Scrapbooking Kits!!

My new freebie kits are possibly my favorite ones I've ever done!!!Ok, so here is the story behind my latest Disney digital scrapbooking kits.  The last trip we took to Disneyland, my son was given an Honorary Citizen of Disneyland button with a "key to the kingdom" on it!  He was so excited and proud of that button that he took it off so it wouldn't get lost or ruined!  He just kept saying that he had a KEY to Disneyland.  It was soooo cute!  So of course, I had to do a kit themed around the Honorary Citizen button for his pages.
Here is his button:

And here is the kit:

And I didn't forget you Disneyworld scrappers either!  I've got one themed around the Disneyworld button also. :)  It's on our list of things to do to get one of these buttons too someday!

And here is it's matching kit:

Do you like them????
You can get them (they're freebies!!!) over at MouseScrappers for a limited time in the June Kit Challenge thread here.
If you complete the challenge and make and post a page using one of the kits, you will get these add-ons as a prize:


So hop on over to MouseScrappers to download the free kits here and join me in the challenge!
Hugs,
Denise aka A Grieving Mommy

Saturday, May 28, 2011

Freebie for my Followers!! My Disney Treats Kit

Hey to my digifriends!  I've giving my latest kit called Disney Treats out to all of my followers.  You can get it on facebook or if you are already subscribed to the newsletter, you will get it in your email in box.  Blog followers will need to email me at agrievingmommy@yahoo.com with their blogger name to get it.


Enjoy!  Thank you for being a digifriend and follower :)
Also, I've had a lot of people requesting that I give out my Mickey's Ice Cream Kit, Disney Traffic and Rainbow Clubhouse kit.  I do plan on giving those out, I just want to update them a bit - they were some of my first kits so I will be doing that as soon as I have time.  Keep a lookout on my blog and facebook if you are wanting those kits!  Also, my Tron kit will be a freebie for followers too!
Hugs,
Denise aka A Grieving Mommy

Sunday, May 22, 2011

Happy 2nd Birthday MouseScrappers!!! Blog Hop and a Disney Digital Scrapbooking Freebie and Tutorial for making Mickey Heads!

My favorite site is having a birthday!  MouseScrappers is 2 years old and we're celebrating with a very special blog hop :)

I have a super fun and useful freebie for you as my part of the blog hop!  And a little tutorial on how to use it :)

It's a Mickey Head Maker - similar to my Disney Alpha Maker - for you to use.  Use it to make Mickey Heads that will match the other items that you've picked up on this blog train.  You can make over 60 different mickey heads in lots of different combinations!!!  (In a psd file for photoshop users or in separate png files for all other programs so everyone can use it.)

Here's a little tutorial on how to make some of your own Mickey Heads using this set:

First, in photoshop, it is super easy.  Just open up the psd file in photoshop (elements or cs - it doesn't matter) and simply click on and off the eyeballs in the layers side menu to choose which layers you want showing!  In this picture below, you can see that I've got the Silver Outline eyeball on as well as the red fill layer, polkadots, and crumpled layer.

Now just go to Layer, Merge Visible and it's ready to be moved onto your scrapbook page!  If you want to make another one, just undo the Merge Visible and start again!!  How easy peasy is that??

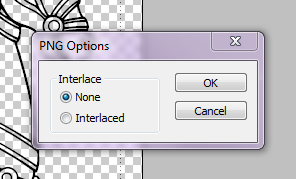
In all other programs, you can simply open what you want to be the bottom layer and then drag other layers on top of it.  It's the same idea, you just need to decide which layers you want and put them on top of each other.  Then put them all together so you can put it on your page!  **The only exception to this is the crumpled layer and the striped layer.  They need to be blended with your base layer.  (This is already done for you in the photoshop psd file.)  In other programs, you will need to change the opacity or blend it to have it look right and take the color of the base layer.

Hope you love it and it helps you create just the right Mickey Head for that special disney scrapbooking page!!!

DOWNLOAD HERE - if you get an error code, try again in a few minutes - it means the server is busy!

You should have come from KaylaLovesMinnie
Your next stop is Roxana
Or if you started here, you can go to the MouseScrappers 2nd Anniversary Activity forum to get the complete list.

People from all over the world have contributed to this blog hop so if you don't see their freebie right away, be sure to check back later!

And... if you love my mickey head maker, have a look around.  I have lots of freebies on my blog and facebook.  And my kits are for charity.
Thanks for comments.  Others' comments and notes of appreciation are what keep me sharing!

Hugs to you,
Denise aka A Grieving Mommy

Thursday, May 19, 2011

Join me for a Speed Scrap and get my Disney Treats Scrapbooking Set

I'm hosting a Speed Scrap on Saturday as part of MouseScrappers' 2nd Birthday Celebration.
Join me and scrap a page to get this Prize :)
Saturday morning at 10am ET, 9am CT, 8am MT, 7am PT, 2pm GMT


I haven't had time to finish the papers, but when I do, I will have them on my blog here.

Find the full info about joining the SS here at MS

Monday, May 9, 2011

For the Lost Children out there - and to all of the Mothers who are Missing them

It's Mother's Day and it's always a hard day for me.  I will never get a Mother's Day card or gift from my girls.  I never even heard, "I Love you, Mama." from them.  It physically hurts to know that I will never spend Mother's Day with my girls, never get a handmade gift or a hug and kiss, breakfast in bed.  My heart just aches - it's like a knife in my heart but when the pain stops for a second and I can think again, I tell my girls it's okay.  Mother's Day is not about me.  It's about them and being thankful that I am a Mom and that I had my beautiful little girls in my arms for one year of my life and how I held them in my arms every night and I bundled them up tight and nursed them (until they got too sick) and kissed them. So, I spent the day spoiling my living son and missing my girls wishing with all my heart that I could just be with them - see them grow, teach them, love them.
My heart hurts so much and yet, there are mothers out there who have it worse than me.  Children who have been stolen and abused or killed - the truly lost children.  This month, my charity kit is to benefit those families.  All profits (minus paypal fees) will go to the National Center for Missing and Exploited Children.  No matter how hard my life feels, I cannot imagine what it would be like to have my child abducted and killed or to never know what has happened to my child.  As hard as it was to bury my girls, I know where they are and can visit their graves.  This Mother's Day, I want to help those Mothers (and families) who may not.
Appropriately, my new charity kit is called The Lost Princess and was themed after Rapunzel, Disney's Lost Princess, from the movie Tangled.  Rapunzel is a princess that was taken from her parents as a baby and is finally reunited with her family at the end of the movie.
Here is the kit.  It is huge - with all of the freebies and add on, it is over 230 MB!  It also includes an alphamaker to make multiple different alphas to match the kit!

I started to make this kit for my daughter, Bree-Elle, on her birthday last month.  She would have been 4 years old.  We bought her a Tangled cake and decorated with Rapunzel items including a purple and pink pinata that my son broke open.  I made this add-on that will be free with a donation for the kit.

You can get the Lost Princess kit and Birthday Part add-on, for a donation of $4.50 or more.  As always, if you would like to make a large donation for tax purposes, you can just send me a copy of the receipt and I will give you the kit.

**I'm sorry! This kit is no longer available.**

Please allow up to 24 hours to get the download links - I have to email them out to your PayPal email address and I do sleep once in awhile even if I'm an insomniac :)

And I've made a freebie for you to match the kit for your Disney digital scrapbooking pages:
Download it here
Enjoy.  I hope you were able to spend Mother's Day with those you love.
Hugs,
Denise aka A Grieving Mommy

Friday, May 6, 2011

Last Chance to get the Coloring Book Scans Mega Prize Package!

Last chance to get the Mega Prize Package.  Details are here at MouseScrappers in their Birthday Anniversary Forum.  The deadline is extended to Sunday, May 8th!

Freebie Frame and Quick Tutorial

Are you looking for great iNSD sales?  Well, my good friend, Anna of Delicious Scraps always has great deals - most of her kits are always 99 cents!  And right now, everything including her awesome CU stuff is 99 cents too.  She also has a ton of freebies on her blog.
Here's her latest kit Bloomsberry with a page I made for my Chloee:

Here's a quick and easy tip/tutorial:
If you want to make a 2 page spread so that you'll have matching pages in your album quickly and easily.  Take your first page and duplicate it.  Then rotate it or rearrange it!  That's what I did with the 2 pages above.  Now I have 2 matching pages ready to be printed and put into her album :)  Makes it so much easier than starting from scratch each time!

And I've got a freebie for you (Thanks, Anna!)  It's the cluster frame I made for my page in png format with a transparent background:

For a limited time, Download it here!
You can find Anna's store at DeliciousScrapShop.com
Hugs,
Denise aka A Grieving Mommy

Thank you for helping Autism Speaks

Just wanted to send a thank you out to all of you that donated for our Huey's Uncle kit!  Together we raised $335 for Autism Speaks ($585 including those who donated separately)!
I am a little behind because of our trip to Disneyland, but I have a new Kit 4 Charity coming out soon to benefit a new charity for the month of May.
For now, here is a freebie from me to thank my followers and digifriends!
Enjoy :)
Thank You Balloons (Mickey Head Balloons for your Disney Digital Scrapbooking)

Download here
Hugs,
Denise aka A Grieving Mommy

Thursday, April 28, 2011

Digital Scrapbooking Tutorial on using Coloring Books on your Digital Scrapbooking Pages and a Mega Prize Package for joining the Challenge!

Here’s my tutorial on using Coloring Books on your Digital Scrapbooking Pages:

I LOVE using coloring books on my scrap pages.  I have over 100 coloring books and I won’t let my son or the kids in my class color them in until I’ve scanned them J he he  They’re mine!
Why are they so awesome?  They’re cheap – I hunt the dollar store and Walmart for them!  You can get 40 pages for $1!!!  Those are unbeatable prices for scrap stuff!  (I’ve also got some really awesome coloring books in Disneyland and Disneyworld so always check out the stores there.)  And there are just so many ways to use coloring book images on your scrapbook pages!  They’re so versatile and customizable!  You can choose the exact colors you want to use to match a certain kit.  You can use it as a background, element, silhouette, or blend.  There are just so many options!!

There are 3 steps to using Coloring Books on your pages:

1.     Digitizing

2.     Extracting

3.     Embellishing
Digitizing

Digitizing your image is simply getting it into your computer!  You can scan or photograph the coloring book page.  (You can also do a google search for coloring book images but beware they are usually very low resolution and won’t print out well!)  Photographing coloring book pages can be tricky due to lighting issues and distortion from the angle at which you photograph the page so I recommend scanning your coloring book page.  The important thing is to scan your image at 300 dpi resolution so that it will be the same size on your scrapbook page (300dpi is standard for scrapbook page resolution).

The scanner that I use for coloring book pages is called a Fujitsu ScanSnap S1300Instant PDF Sheet-Fed Mobile Scanner.  It is awesome.  It does 10 coloring book pages at a time – both sides at once (duplex) – so really 20 pages at once.  It is pretty expensive though L  But any scanner will work just make sure it’s scanning at 300 dpi.

Once you have your image in the computer, you are ready to move to step #2 and extract it.

Extracting

Unless you have a coloring book image already in png format (a file that has a transparent background) in which case you can skip this step, you are going to want to remove the white background from the coloring page so that you can use it on a scrapbook page.  There are a few different ways to do this.  Basically, you want to select all of the white and delete it from the image.  Depending on your program, you can just use a selection tool like the magic wand tool, etc. to select all of the white and delete it.  (Sometimes photoshop will make you duplicate the layer before you can delete anything from it.  Or it won’t turn transparent unless you duplicate the background layer – then you can just delete the background layer.)  In Photoshop CS versions, you can go to Select Color Range and choose white.  This will select all of the white on the page for you so you don’t have to click so many times like you would using the magic wand tool.  Then you can delete the white part.
Here is what the image looks like after being scanned (usually a jpg or pdf file):

Here is what you want it to look like (removing the white part):

Or if you have Photoshop and know how to install and use actions, you can use my ColoringBook Action for Photoshop.  It isavailable in the chat mini kit download found here.  It will automatically select and delete the white part of the coloring page for you and then save it as a png and all you have to do is push the play button.  This is super useful for when you are scanning and extracting a large number of pages!  Find out more about installing actions and styles for Photoshop Elements at ScrapOrchard’s video tutorials by SuzyQ here.  (Installing styles and actions use the same basic process.)
Once you have removed the white part of the coloring page, you are ready to move onto step #3 Embellishing.  (Just don’t forget to save your extracted image as a png file for future use!)  BTW – when saving your image as a png file, a box will come up saying “Interlace” with choices None and Interlaced.  You want to choose None.  Then click OK.

Embellishing
There are LOTS of different ways to use a coloring book image on your page.  Here are some ideas:

Color it in.

To color in a coloring book image.  You need to select the area and then fill it with a color.  There are LOTS of different ways to do this.  You can use the paintbucket tool.  You can select the area you want to color and then go to Layer, New Fill Layer and choose the color.
This is the process that I use.  First I open up the kit that I want to use so that I have access to the exact colors to make the image match my page and elements.  Next, I select the part I want to color by using my magic wand tool and clicking inside the transparent part.  Then (because I’m picky and I don’t want a gap in between the black outline and my coloring)  I choose Select then Modify and Expand to make the selection just a little bit bigger – usually 2 pixels is about right.  (You can skip this step if you aren’t picky – you really can’t hardly tell.)  Then I either use the paint tool to hand paint the selection (if I want a bit of variation) or I go to Layer, New Fill Layer and choose my color.  I like to keep my layers separate in case I decide to change something or make a mistake, it’s easier to remove or change a layer but you don’t have to do that.  Continue coloring your image.  Sometimes you might just want to color their hat or a part of the image.  Sometimes you want it all colored!  It just depends on the look you are going for.  When you are done coloring, remember to save it as a separate png file in case you want to use it again and so you don’t save over your original png image.
Here's a pic of me coloring an image using that method:
The Alice, Mad Hatter, and White Rabbit were a coloring book image that I painted for this page:


Make a silhouette.

Silhouettes can be really fun to use on a page.  They are simply a blacked out image.  You can do this easily by selecting the outside portion of the coloring book image (the transparent part outside of the image).  One click with the magic wand tool will do it.  Then you will want to select the Inverse so that you have all of the image selected – the inside and outline portions.  You can select the inverse by going to Select and Inverse in Photoshop programs.  (You could go through and select each and every part of the image but that just takes longer!)
Now you are ready to fill it with black or white or any other color for that matter! You could even fill with a paper!  You can paint it black, use the paintbucket tool, or go to Layer, New Fill Layer and select the color you want.
The Mickey on this page was a coloring book image that I turned into a silhouette:

Use it as an outline.

I love to use the coloring book image as an outline but I like to add color to it.  Plain old black outlines are boring to me.  You could select it and paint it a color, but I prefer to use a clipping mask with this method.  A Clipping Mask is when you have a layer take the shape of another layer.  In this case, we want something to take the shape of the outline of the coloring book image.

So bring a paper or paint smear, or gradient and put the layer on top of the image.  Next, (in Photoshop) make sure you are on the top layer, then go to Layer, and Create Clipping Mask.  This will make the paper or whatever you have chosen take the shape of the coloring book outline.  I have used paint smears, scribbles, masks, papers, gradients, etc. to fill coloring book outlines! Be creative.  You can use more than one, overlay different ones on top of each other, or use different ones together to create your own unique effect.
This example has 2 papers clipped to it:

I used the clipping mask method on these 2 pages (using a paintsmear on the tron monorail and multiple scribbles on the goofy one):


Other ideas that I will not go into today are making a mask or photo frame, making patterned paper using the image, or blending the coloring book image into your background or photo.

There are really endless ways to use coloring book images on your scrapbook pages!!!  I hoped you enjoyed this tutorial and found it useful – please leave a comment if you did!

If you have any questions, you can contact me at agrievingmommy@yahoo.com.  We are going to be in Disneyland next week, so please be patient with me getting back with you!

FAQ:

Filling the Black Outline of a Coloring Image in Better:

Sometimes, coloring book images are not printed the best and the black outline is not as dark as you’d like it to be.  There are different things you can do to help this.  One thing you can try is to select the transparent parts and then select the inverse (this is better than just selecting the black so that you get the transparent and white parts selected with the black) so that all of what should be black is selected.  Then you can fill it with black using the Layer, New Fill Layer or paintbucket/paint tools.  Another way is to try adding a stroke to the image.  You can go to Edit and Stroke to try this method.  There are 3 different choices for adding a stroke that you can play around with – Inside, Center and Outside.

WHEW!  That was the longest post I've ever written :)

Now for the fun part - the challenge!  You need to make a scrapbook page that uses a coloring book image on it.  It can be one from me or one that you've scanned yourself.  Post it in the MouseScrappers Gallery here and in the forum thread here!  Do this by Thursday, May 5th and get a Mega Prize Package - 100 pages of coloring book images that I have scanned and extracted, ready for you to use on your scrapbook pages.
And here's a freebie for you.  The Miss Daisy that I scanned, extracted, and recolored.  It will go perfectly with Natalie and my collab kit Huey's Uncle!
Download it here.
Hugs,
Denise aka A Grieving Mommy

Chat Today at 930 EST

Join me today for the coloring book chat today at 930EST in the MouseScrappers chat room here.
Your username is just your name!  See you then :)
Make sure you download the freebie for the chat.

Tuesday, April 26, 2011

Join me for a Chat Thursday and get a free Mega Pack!

Did you know MouseScrappers is turning 2 years old?  To celebrate they are having tons of fun activities all month - starting with some chats this week!
Join me on Thursday at 9:30ET for a chat on my secret weapon - Coloring Book pages!  They're super cheap and so versatile to use on your pages!!  I love them :)  I will be showing you multiple different ways to use them and giving you an action to easily extract them (for Photoshop CS and up).  Plus if you complete the challenge, you'll get a huge mega pack of Disney coloring book pages I've extracted for you perfect for your Disney scrapbook pages!

Find the info for the chat and challenge here at MouseScrappers

Download this Coloring Book mini for the chat and I'll see you then!
Hope to see you there!
Hugs,
Denise
aka A Grieving Mommy

Tuesday, April 19, 2011

Join me for a Scraplift Challenge and get my Tron Digital Scrapbooking Kit!!!

My little boy is infatuated with Tron.  I blame the Disney Channel :)  They really promoted that show and when we were in Disneyland last, he was so excited to see the Electronica area over at the California Adventure side of Disneyland.
Then we saw the movie and he LOVED IT so we had to get the toys.  So of course I had to make a Tron kit for him!!!
Here are my pages of my boy getting his Tron toys.  He he, they make me laugh.  What would I do without that kit :)  The photos captured exactly how excited he was!


I still need to do the pages of him seeing the movie.
But I also found that this kit is awesome for Star Wars and Monorail pages when I used it to do a Monorail page last night:
We rode in the front of the monorail (never done that before!) and it was super cool :)
Here's the kit:
You can only get it by completing my Scraplift Challenge over at MouseScrappers this week.  Find the info about it here.
This kit will never be for sale (since it has so many Disney specific items), so join me in the challenge to get it!  (Or at least follow me through my blog or facebook to have a chance to get it after the challenge!)
Hugs :)
Denise aka A Grieving Mommy
PS - I did include the monorail from my scrap page with Mickey and Donald in the kit too!!

Sunday, April 17, 2011

There is no footprint so small that it doesn't leave an imprint on this World

"There is no footprint so small that it does not leave an imprint on this World."

Every birthday of my daughters, we do a service project.  We've done all kinds.  Last year, we donated a year pass to the local children's museum for families at the hospital to use.  Another year, we donated swings to the infant unit at the hospital for the babies to use.  It is our way of honoring our girls on their special day by making the world a better place.
This year, we made handprint and footprint cards for our local Share Unit.  Share is an organization that helps families who have lost a baby.  They do hospital visits, make hand and foot molds as well as prints, provide support groups and have a phone hotline for grief support - just to name a few.
The cards are blank with the above quote on them so that parents have a chance to get prints before their child is buried or cremated and they will not be able to do that anymore.
Here is an example of what we made showing a sample card I made for my Bree's handprints.

We met today for her family birthday party.  We let off balloons with messages written to her and we had a Tangled/Rapunzel cake.  It was another hard day, but it was nice to spend the day remembering her.

I made a little freebie for you with the wordart I made for the handprint and footprint cards.  I also included the footprints and handprints, the arrow and dotted border too.
Hope you can use it and document something special in your life :) 
I also want to send out a thank you to those of you that sent sweet messages on Bree's birthday.  I sooo appreciate you and thank you for your kindness.  It DOES help to know that people care.


Hugs to you,
Denise aka A Grieving Mommy

Saturday, April 16, 2011

Disney Labels

I've got a prize for you over at MouseScrappers - these Disney Labels:
It has 54 different disney labels.  Find out more about how to get these at the challenge HERE.

Wednesday, April 13, 2011

Happy Birthday to my Lost Princess

The movie Tangled is without a doubt my favorite movie of all time.  It has such a huge significance  to me and correlates to my life in so many ways.  My favorite part is when you see her parents, the King and Queen, on her 18th birthday - still crying, still missing their baby girl that was taken, sending off lanterns in her memory.  I will be no different.  No matter how many years pass, I could be 99 years old, and I will still miss my girls.  Nothing will change that.  I will still cry and hurt because I will still love them then.
Today is my daughter, Bree-Elle's 4th birthday.  She's my baby and it's hard to believe that she wouldn't be a baby anymore.  It feels like yesterday that she died in my arms cuddled in bed with us.  How could she be 4 years old?  How could I have missed out on so much??  I don't know how I will make it to her 18th birthday but if I do there is no doubt that I will cry that day too.  And like the King and Queen, we will let off our own "lanterns" (balloons) in her memory today still remembering her.  We even ordered her a Tangled birthday cake and decorations for her grave.
One of my best friends said to me last night that Rapunzel "screams Bree-Elle".  She was everything purple and pink, sweet and spunky and a little goofy too.  She was very different from her other sister that died, Chloee.  Chloee was more what I would call a classic Princess - quiet, shy, regal, beautiful.  I'm so thankful I got the chance to know them and love them - a lot of my friends had stillborns and they didn't get that chance.  But the bad side of that is that the suffered very much in their short lives.  They were so sick - thinking of it just physically hurts me and makes me so sick.
Today we will spend the day together as a family.  I am donating blood and we might stop by the hospital to donate some things.  We will spoil our living son and just take it easy on ourselves.
I spent this morning scrappin a page for my Lost Princess, my Bree-Elle, using my latest kit I've been working on.  She was so sick in this photo, but I think it still shows how beautiful she was.
The kit will be out in a few days to benefit a new charity.
Well, my boy is up and singing, "Happy Bree-Elle Birthday".  So I am off to enjoy my last living child.
Here is the wordart from my page as a freebie for you for any Tangled scrapbook pages you need to do or save it for future ones!

Download here

Monday, April 11, 2011

Last Call for Donald Duck Digital Scrapbooking Kit

I finished scrappin my Donald Duck's houseboat in Toontown pages for this last trip to Disneyland.  Here's my page:

And I've got another freebie for ya!  Only a few more days to pick up our Huey's Uncle Kit and have the proceeds go to Autism Speaks.  I have a new kit coming out in a few days and then we will be switching over to a new charity.
Here's the freebie:

Download it here
Hugs,
Denise aka A Grieving Mommy