
I LOVE using coloring books on my scrap pages. I have over 100 coloring books and I won’t let my son or the kids in my class color them in until I’ve scanned them J he he They’re mine!
Why are they so awesome? They’re cheap – I hunt the dollar store and Walmart for them! You can get 40 pages for $1!!! Those are unbeatable prices for scrap stuff! (I’ve also got some really awesome coloring books in Disneyland and Disneyworld so always check out the stores there.) And there are just so many ways to use coloring book images on your scrapbook pages! They’re so versatile and customizable! You can choose the exact colors you want to use to match a certain kit. You can use it as a background, element, silhouette, or blend. There are just so many options!!There are 3 steps to using Coloring Books on your pages:
1. Digitizing
2. Extracting
3. Embellishing
DigitizingDigitizing your image is simply getting it into your computer! You can scan or photograph the coloring book page. (You can also do a google search for coloring book images but beware they are usually very low resolution and won’t print out well!) Photographing coloring book pages can be tricky due to lighting issues and distortion from the angle at which you photograph the page so I recommend scanning your coloring book page. The important thing is to scan your image at 300 dpi resolution so that it will be the same size on your scrapbook page (300dpi is standard for scrapbook page resolution).
The scanner that I use for coloring book pages is called a Fujitsu ScanSnap S1300Instant PDF Sheet-Fed Mobile Scanner. It is awesome. It does 10 coloring book pages at a time – both sides at once (duplex) – so really 20 pages at once. It is pretty expensive though L But any scanner will work just make sure it’s scanning at 300 dpi.
Once you have your image in the computer, you are ready to move to step #2 and extract it.
Extracting
Unless you have a coloring book image already in png format (a file that has a transparent background) in which case you can skip this step, you are going to want to remove the white background from the coloring page so that you can use it on a scrapbook page. There are a few different ways to do this. Basically, you want to select all of the white and delete it from the image. Depending on your program, you can just use a selection tool like the magic wand tool, etc. to select all of the white and delete it. (Sometimes photoshop will make you duplicate the layer before you can delete anything from it. Or it won’t turn transparent unless you duplicate the background layer – then you can just delete the background layer.) In Photoshop CS versions, you can go to Select Color Range and choose white. This will select all of the white on the page for you so you don’t have to click so many times like you would using the magic wand tool. Then you can delete the white part.
Here is what the image looks like after being scanned (usually a jpg or pdf file):

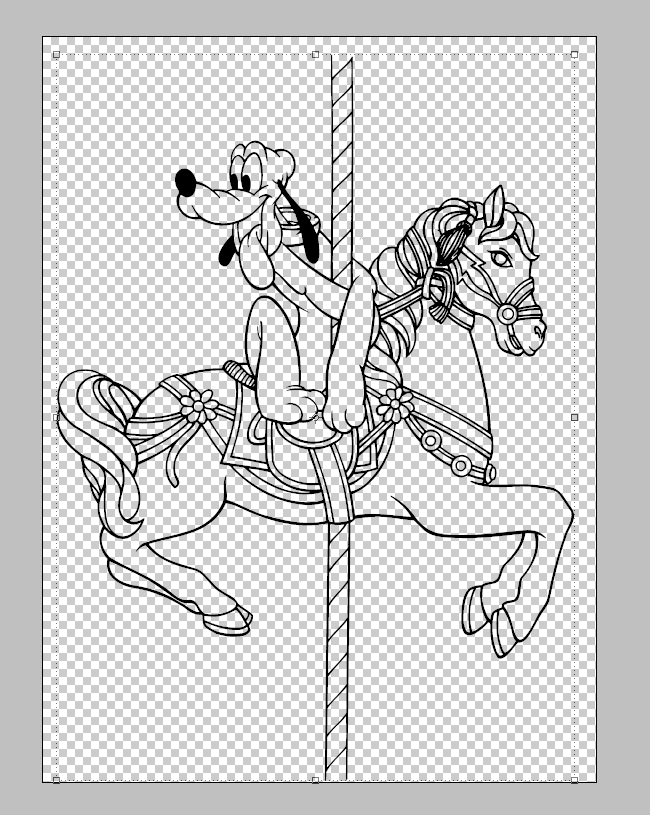
Here is what you want it to look like (removing the white part):
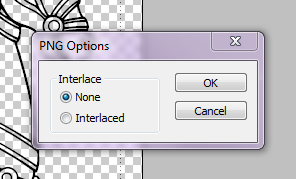
Or if you have Photoshop and know how to install and use actions, you can use my ColoringBook Action for Photoshop. It isavailable in the chat mini kit download found here. It will automatically select and delete the white part of the coloring page for you and then save it as a png and all you have to do is push the play button. This is super useful for when you are scanning and extracting a large number of pages! Find out more about installing actions and styles for Photoshop Elements at ScrapOrchard’s video tutorials by SuzyQ here. (Installing styles and actions use the same basic process.)
Embellishing
Color it in.
To color in a coloring book image. You need to select the area and then fill it with a color. There are LOTS of different ways to do this. You can use the paintbucket tool. You can select the area you want to color and then go to Layer, New Fill Layer and choose the color.
This is the process that I use. First I open up the kit that I want to use so that I have access to the exact colors to make the image match my page and elements. Next, I select the part I want to color by using my magic wand tool and clicking inside the transparent part. Then (because I’m picky and I don’t want a gap in between the black outline and my coloring) I choose Select then Modify and Expand to make the selection just a little bit bigger – usually 2 pixels is about right. (You can skip this step if you aren’t picky – you really can’t hardly tell.) Then I either use the paint tool to hand paint the selection (if I want a bit of variation) or I go to Layer, New Fill Layer and choose my color. I like to keep my layers separate in case I decide to change something or make a mistake, it’s easier to remove or change a layer but you don’t have to do that. Continue coloring your image. Sometimes you might just want to color their hat or a part of the image. Sometimes you want it all colored! It just depends on the look you are going for. When you are done coloring, remember to save it as a separate png file in case you want to use it again and so you don’t save over your original png image.
Here's a pic of me coloring an image using that method:

Make a silhouette.

Silhouettes can be really fun to use on a page. They are simply a blacked out image. You can do this easily by selecting the outside portion of the coloring book image (the transparent part outside of the image). One click with the magic wand tool will do it. Then you will want to select the Inverse so that you have all of the image selected – the inside and outline portions. You can select the inverse by going to Select and Inverse in Photoshop programs. (You could go through and select each and every part of the image but that just takes longer!)
The Mickey on this page was a coloring book image that I turned into a silhouette:

I love to use the coloring book image as an outline but I like to add color to it. Plain old black outlines are boring to me. You could select it and paint it a color, but I prefer to use a clipping mask with this method. A Clipping Mask is when you have a layer take the shape of another layer. In this case, we want something to take the shape of the outline of the coloring book image.
So bring a paper or paint smear, or gradient and put the layer on top of the image. Next, (in Photoshop) make sure you are on the top layer, then go to Layer, and Create Clipping Mask. This will make the paper or whatever you have chosen take the shape of the coloring book outline. I have used paint smears, scribbles, masks, papers, gradients, etc. to fill coloring book outlines! Be creative. You can use more than one, overlay different ones on top of each other, or use different ones together to create your own unique effect.
This example has 2 papers clipped to it:


There are really endless ways to use coloring book images on your scrapbook pages!!! I hoped you enjoyed this tutorial and found it useful – please leave a comment if you did!
If you have any questions, you can contact me at agrievingmommy@yahoo.com. We are going to be in Disneyland next week, so please be patient with me getting back with you!
FAQ:
Filling the Black Outline of a Coloring Image in Better:
Sometimes, coloring book images are not printed the best and the black outline is not as dark as you’d like it to be. There are different things you can do to help this. One thing you can try is to select the transparent parts and then select the inverse (this is better than just selecting the black so that you get the transparent and white parts selected with the black) so that all of what should be black is selected. Then you can fill it with black using the Layer, New Fill Layer or paintbucket/paint tools. Another way is to try adding a stroke to the image. You can go to Edit and Stroke to try this method. There are 3 different choices for adding a stroke that you can play around with – Inside, Center and Outside.
WHEW! That was the longest post I've ever written :)
Now for the fun part - the challenge! You need to make a scrapbook page that uses a coloring book image on it. It can be one from me or one that you've scanned yourself. Post it in the MouseScrappers Gallery here and in the forum thread here! Do this by Thursday, May 5th and get a Mega Prize Package - 100 pages of coloring book images that I have scanned and extracted, ready for you to use on your scrapbook pages.
Download it here.

Denise aka A Grieving Mommy


10 comments:
Denise, thank you for your effort in sharing all this great information! the chat last night was really fun, and your tutorial will help me remember how to use these great techniques. Thank you, thank you, thank you!
Dang girl, you got that up quick! Had a blast in chat last night, thanks so much :D
Thanks, for the tutorial. I really liked the chat last night. You taught me so much! Wahoomrm/Michelle
Denise, Thank you so much! The chat last night was wonderful and so are these instructions!!
Thank you - these are some really great ideas! I think I will print the post and keep it for future use! :)
Thank you so much for this very useful tutorial!! The chat was so late for me (gmt +2) that i had to miss it. I was so happy when i saw that you had made the effort to make the tutorial and putt it on your blog! You made my day!
Thank you for having the tutorial last night. I thought it was great!
Hey Denise - thanks for the great information. Since I've PSE7 I don't think the action will work. I've got it installed, but keep getting the error message "The command "Color Range" is not currently available, followed by "The command "Delete" is not currently available, followed by "The object "layer"Layer1"" is not currently available and says it can't be saved.
So, does this only work with PS and not PSE or am I doing something horribly wrong.
Thanks,
Barb
albbarcat@gmail.com
What a great tutorial! Thank you!
WOW! I just LOVE all your Disney pages!! I wish I was as crafty as you. This is the only place I have been able to find ANY Disney stuff for scrapbooking. Do you have a store I can buy this stuff at?? My email is dandywest@hotmail.com
Thanks
Cassie
Post a Comment